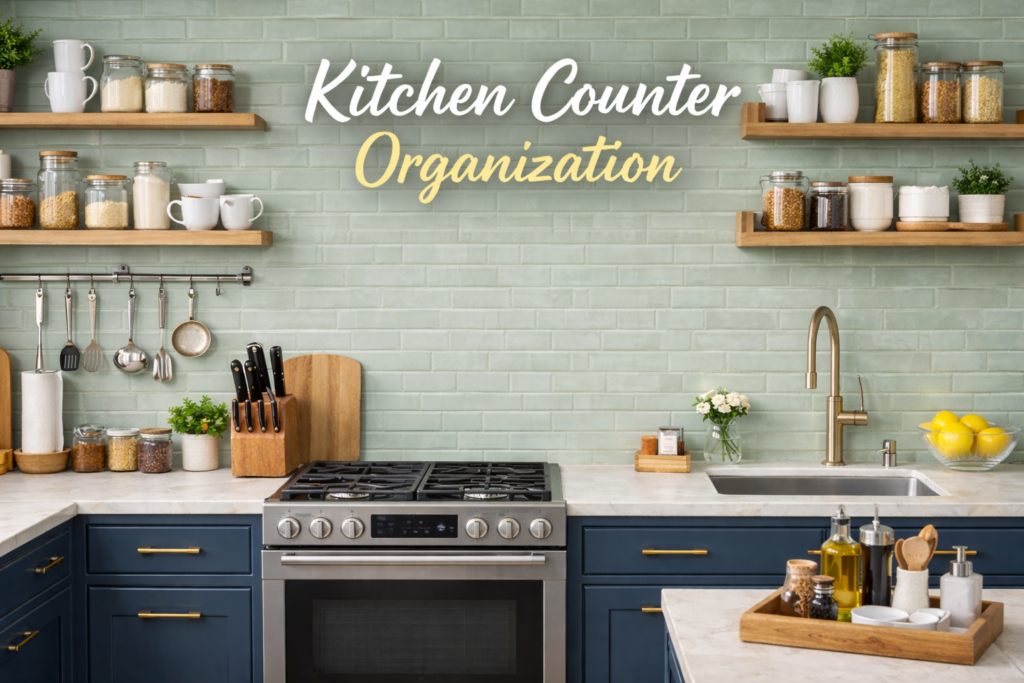
Let’s be honest, no matter how beautiful your kitchen is, if the counter is cluttered, the entire space feels messy.
And it happens so easily.
One appliance here. A spice jar there. Dish soap, fruit basket, random paper, and suddenly your counter feels crowded and stressful.
The good news? With the right kitchen counter organization strategy, you can completely transform your kitchen into a clean, functional, and peaceful space without renovating or spending a lot of money.
In this detailed guide, we’ll walk through practical, realistic, and easy-to-follow steps to master kitchen counter organization in any kitchen.
Why Kitchen Counter Organization Actually Matters?
Many people think organization is only about aesthetics. But in reality, kitchen counter organization directly affects your daily life.
When your counter is organized:
- You cook faster.
- You clean quicker.
- You waste less time searching for things.
- You feel calmer while working.
- Your kitchen looks instantly bigger.
On the other hand, cluttered counters reduce workspace, collect dust and oil, and make cleaning exhausting.
A well-organized counter creates flow. And flow makes cooking enjoyable.
Step 1: Start With a Complete Declutter
Before organizing anything, you need a clean slate.
Yes, remove everything from your counter.
This step may feel extreme, but it’s powerful. When your surface is empty, you can clearly see how much space you actually have.
Now, evaluate every item before putting it back.
Ask yourself:
- Do I use this daily?
- Does this need to stay on the counter?
- Can this be stored inside a cabinet?
- Is this decorative item worth the space it occupies?
The foundation of smart kitchen counter organization is intentional placement. If something doesn’t serve a clear purpose, it doesn’t belong on the counter.
Be honest during this step; it makes everything easier later.
Step 2: Create Functional Zones for Better Kitchen Counter Organization
One of the biggest mistakes people make is placing items randomly.
Instead, divide your counter into functional zones. This is a simple yet powerful Kitchen Counter Organization technique used by professional organizers.
The Prep Zone
This should be your largest and cleanest area.
Keep:
- Cutting board
- Knife block or magnetic strip
- Mixing bowls (if used daily)
This area needs maximum open space. Avoid filling it with jars and decor.
The Cooking Zone
Place this near your stove.
Keep:
- Oil dispenser
- Salt & pepper
- 3–4 most-used spices
- Spoon rest
Avoid storing your entire spice collection here. Limit it to daily essentials only.
The Cleaning Zone
Near the sink, create a compact and tidy cleaning setup.
Keep:
- Dish soap in a dispenser
- Sponge holder
- Hand wash
- Small tray to group these items
Using a tray instantly improves Kitchen Counter Organization by visually grouping items.
The Beverage or Coffee Zone (Optional)
If you’re a tea or coffee lover, dedicate a small section.
Keep:
- Coffee machine or kettle
- Sugar jar
- Tea container
- 2–3 mugs
Store extras inside cabinets to prevent overcrowding.
Step 3: Use Smart Storage to Elevate Your Kitchen Counter Organization
The right storage solutions make a huge difference.
Use Trays to Contain Clutter
Trays create structure.
For example:
- Cooking oil + salt + pepper on a wooden tray
- Dish soap + sponge on a marble tray
- Coffee essentials grouped together
This small change makes your counter look styled instead of messy.
Think Vertical, Not Horizontal
If your counter space is limited, use vertical storage:
- Wall-mounted spice racks
- Floating shelves
- Magnetic knife strips
- Under-cabinet hooks
Vertical storage is one of the smartest hacks in the small-space Kitchen Counter Organization.
Use Matching Containers
Uniform jars for flour, sugar, coffee, and dry items create a clean, cohesive look.
Transparent containers are especially helpful because:
- You can track stock easily
- They reduce food waste
- They look minimal and organized.
Consistency makes your kitchen feel premium.
Step 4: Limit Countertop Appliances
Appliances are usually the biggest space stealers.
To improve kitchen counter organization, follow this simple rule:
If you don’t use it at least 2–3 times a week, store it away.
Keep only:
- Daily-use mixer
- Toaster
- Coffee machine
Store away:
- Sandwich maker
- Juicer
- Food processor
- Extra blender jars
The more surface area you free up, the better your kitchen will feel.
Step 5: Add Intentional, Minimal Decor
Organization doesn’t mean your counter should look empty or lifeless.
Add personality, but in moderation.
Good decor choices:
- A small indoor plant
- A fruit bowl
- A wooden cutting board placed vertically
- A minimal vase with fresh flowers
The key is balance. One or two decor pieces are enough.
Too much decor ruins kitchen counter organization.
Step 6: Adopt the 5-Minute Night Reset
Here’s a simple habit that changes everything.
Every night:
- Wipe the counters
- Put items back in their zones
- Remove unnecessary clutter
- Wash dishes immediately.
This simple routine maintains your kitchen counter organization in the long term.
Consistency is more important than perfection.
Kitchen Counter Organization for Small Kitchens
If you live in a small apartment, this section is especially important.
Small kitchens require smarter decisions.
- Use slim utensil holders
- Install corner shelves
- Avoid bulky decor
- Choose multi-purpose tools
- Use stackable containers.
In compact kitchens, every inch matters. Thoughtful kitchen counter organization can make a tiny space feel surprisingly spacious.
Common Kitchen Counter Organization Mistakes to Avoid
Even with good intentions, mistakes happen.
Avoid:
- Keeping too many appliances out
- Overfilling trays
- Buying organizers without measuring space
- Ignoring vertical storage
- Adding too much decor
Organize your kitchen, not create more work.
Long-Term Maintenance for Kitchen Counter Organization
The real challenge isn’t organizing once, it’s maintaining it.
To keep your counters clutter-free:
- Do weekly quick declutters
- Reassess unused items monthly
- Clean trays and containers regularly
- Avoid impulse purchases.
A sustainable kitchen counter organization system grows with your lifestyle.
Final Thoughts
Kitchen counter organization isn’t about having a Pinterest-perfect kitchen.
It’s about creating a space that feels:
- Functional
- Calm
- Efficient
- Easy to clean
- Enjoyable to cook in
Start small. Clear one section today. Create zones. Add a tray. Remove one unnecessary appliance.
Little changes lead to big transformations.
Your kitchen doesn’t need to be bigger; it just needs to be organized intentionally.
Frequently Asked Questions (FAQs)
Q1. How often should I reorganize my kitchen counter?
Answer: Ideally, you should reassess your kitchen counter organization every 2–3 months. Seasonal cooking habits, new appliances, or lifestyle changes can affect how your counter functions. A quick refresh ensures your setup continues to serve your needs efficiently.
Q2. How do I organize kitchen counters in a shared household?
Answer: In shared homes, assign specific zones and limit personal items. Agree on rules such as:
- No random paper clutter
- Return items to their designated zones
- One-in, one-out rule for new items
Clear communication helps maintain long-term kitchen counter organization.
Q3. What materials are best for countertop organizers?
Answer: Choose materials that are:
- Water-resistant (acrylic, stainless steel, sealed wood)
- Easy to clean
- Durable
Avoid fabric organizers near the sink, as moisture can promote mold growth. Durable materials support sustainable kitchen counter organization.
Q4. How do I prevent oil stains and sticky buildup on organized counters?
Answer: Use:
- Easy-to-clean trays under oil bottles
- Non-slip mats
- Weekly deep cleaning for high-use zones
Maintenance protects both your surfaces and your kitchen counter organization system.
Q5. Is open shelving better for kitchen counter organization?
Answer: Open shelving can support kitchen counter organization if styled minimally. It allows you to move items off the counter while keeping them accessible. However, it requires consistent upkeep to avoid visual clutter.
Q6. What color choices make counters look more organized?
Answer: Neutral tones, matching containers, and consistent finishes create visual harmony. Even simple coordination (like all-black or all-glass dispensers) instantly enhances kitchen counter organization.